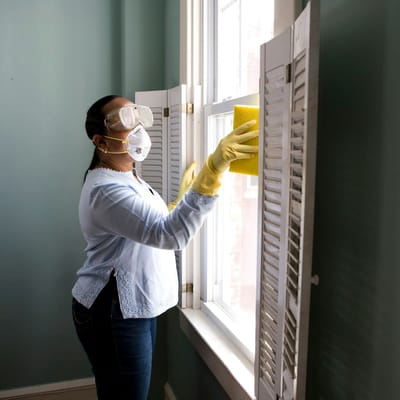
A drafty room is more than an annoyance: uncontrolled air leakage can make a home less comfortable and force heating or cooling equipment to work harder. ENERGY STAR says sealing leaks and adding insulation can improve comfort and energy efficiency, with simple fixes such as weatherstripping doors and caulking windows among the easiest places to begin.
Start with a simple draft audit
Choose a windy day, turn off combustion appliances, and slowly move your hand around closed windows, exterior doors, baseboards, plumbing penetrations, and attic access panels. A smoke pencil can make subtle air movement easier to see, but never use an open flame. Also look for daylight, worn seals, rattling panes, and dirty streaks that often mark moving air.
Build a starter kit with a smoke pencil, tape measure, and removable painter’s tape for marking each leak.
Use the right seal for each gap
Caulk is intended for joints that stay still, such as the narrow gap between a window frame and trim. Weatherstripping belongs on moving components, including operable windows and doors. Before buying anything, measure the width and depth of the gap so the product compresses enough to seal without making the door difficult to close.
- Small stationary cracks: use paintable acrylic-latex caulk indoors. For wet or exterior locations, choose a sealant rated for that exposure.
- Door stops and window sashes: use adhesive foam, rubber, or silicone weatherstripping sized to the gap.
- Bottom of an exterior door: install an adjustable door sweep or replace a damaged threshold seal.
- Larger penetrations: use an appropriate expanding foam only where the label permits it; choose low-expansion window-and-door foam near frames.
Shop for paintable caulk and a caulk gun, door and window weatherstripping, or an adjustable door sweep.
How to caulk a clean, durable joint
- Remove loose old caulk and clean away dust, grease, and moisture.
- Cut the nozzle slightly narrower than the joint and puncture the inner seal.
- Hold the gun at roughly 45 degrees and apply one steady bead.
- Tool the bead promptly with a caulk-finishing tool or damp finger, following the product instructions.
- Allow the sealant to cure fully before painting or exposing it to water.
Weatherstrip without creating a new problem
Clean the mounting surface, test-fit a short section, then install the seal without stretching it. Close and reopen the door several times. You want continuous contact, not so much pressure that the latch strains. At the bottom, set the sweep just low enough to touch the threshold.
Know when to stop
Do not block intentional vents, exhaust outlets, or combustion-air openings. ENERGY STAR advises extra caution around recessed lights, flues, old wiring, damp insulation, and signs of roof or moisture damage. If an attic contains mold, rot, knob-and-tube wiring, or vents that terminate indoors, call a qualified professional before sealing or insulating.
Finally, repeat the draft check and note what changed. A careful afternoon spent on measured, targeted repairs can make rooms feel calmer and more even without turning the house into an unsafe sealed box.

Make a room-by-room air-leak map
Start at the lowest level and work upward. Mark exterior doors, operable windows, plumbing and cable penetrations, fireplace surrounds, attic hatches, recessed lights, and transitions between additions. Note the material, approximate gap, whether the joint moves, and whether moisture or staining is present. This turns a vague “drafty house” complaint into a prioritized repair list.
Test under realistic conditions. Close windows and doors, run exhaust fans briefly, and use a smoke pencil according to its instructions. Never use an open flame. On windy days, compare opposite sides of the home because pressure changes can make leaks easier to find. A thermal camera can reveal temperature patterns, but it does not prove air movement by itself.
Prioritize safety before comfort
Air sealing changes how a house exchanges air. Homes with natural-draft furnaces, boilers, water heaters, fireplaces, or gas appliances need special care because exhaust gases must continue to vent safely. Do not seal combustion-air openings or flues. If you are unsure how equipment receives combustion air, arrange a professional energy assessment that includes combustion-safety testing.
Stop and call a professional when you find damp insulation, active leaks, rot, extensive mold, old damaged wiring, asbestos-containing material, or exhaust ducts terminating in an attic. Moisture sources should be corrected before insulation or sealant hides them.
Doors: fix alignment before adding thicker seals
A door that has dropped on its hinges will not be cured by bulky foam. Tighten loose screws, confirm the frame is sound, and check the reveal around all four sides. Replace stripped screws with an appropriate repair, then choose weatherstripping that compresses evenly along the stops. At the threshold, adjust the sweep until it contacts without dragging heavily.
After installation, close the door on a strip of paper at several points. Consistent resistance suggests a continuous seal. Easy movement at one corner indicates a gap; excessive resistance can prevent latching and damage the seal.
Windows: distinguish air leaks from glass heat loss

Moving air around trim can often be sealed, but a cold pane may simply be conducting heat. Inspect sash locks, meeting rails, balances, and existing gaskets. Clean tracks before adding weatherstripping and keep drainage holes open. Caulk stationary joints between trim and wall or frame where appropriate, never moving sash channels.
Removable interior window film can be a seasonal option for sound windows, while cellular shades may improve comfort near glass. Neither product repairs rotten frames, failed flashing, or water intrusion. Staining below a window deserves investigation before cosmetic caulk is applied.
Attic hatches and penetrations
Attic access panels often leak around their perimeter. Add durable gasket material to the stop, insulate the panel where appropriate, and use latches that compress the seal. Around wiring and pipes, choose a sealant rated for the location and gap. Maintain required clearances from chimneys, flues, recessed lights, and heat-producing equipment.
ENERGY STAR recommends sealing attic leaks before adding insulation. Otherwise, insulation can hide gaps while warm, moist indoor air continues to reach cold surfaces. Professional guidance is appropriate when access is difficult or hazards are present.
Basements, crawlspaces, and rim joists
Lower-level leaks can feed the stack effect that draws air upward through a house. Inspect the sill plate, rim joists, utility penetrations, bulkhead doors, and basement windows. Small stationary cracks may accept caulk; larger gaps may require compatible foam or rigid materials installed to local fire-safety requirements.
Do not cover termite inspection zones, drainage paths, or moisture problems. In humid climates, an unplanned change to crawlspace ventilation can worsen conditions. Coordinate air sealing, drainage, vapor control, and dehumidification as one system.
Choose and apply sealants correctly
Read the complete label for substrate compatibility, joint size, temperature, paintability, ventilation, cure time, and cleanup. Silicone performs well in many wet or exterior joints but is difficult to paint. Acrylic-latex products are often easier indoors. Specialty high-temperature sealants are required near approved heat applications.
Good joints are clean, dry, and correctly sized. Deep gaps may need backer rod so sealant forms an hourglass profile rather than bonding on three sides. Apply a continuous bead, tool it within the working time, and allow full cure. More sealant is not always better; proper geometry improves movement and durability.
Verify the improvement
Repeat the same paper, smoke-pencil, and comfort checks after curing. Record indoor temperature and humidity before and after, but remember that weather changes affect results. Watch for condensation, odors, or appliance-drafting symptoms. A blower-door test by an energy professional provides a more reliable measurement and can locate leaks that visual inspection misses.
A maintenance calendar
- Inspect exterior caulk and door sweeps each spring and fall.
- Clean window tracks and drainage openings.
- Replace compressed or torn weatherstripping.
- Check attic and basement areas after severe weather.
- Keep exhaust outlets and intentional vents unobstructed.
Thoughtful air sealing is a series of small, measured repairs—not a race to close every opening. When materials, moisture, ventilation, and combustion safety are considered together, the result is a more comfortable and efficient home.