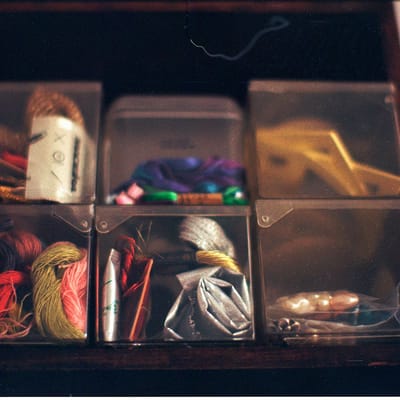
Creative work rarely ends exactly when the table must be cleared. Without a pause system, beads disappear, hardware migrates and the next session begins with detective work. A project box preserves the state of the work so you can stop quickly and restart with confidence.

Limit one box to one active project
Do not turn the project box into general storage. It should contain only the materials, tools and references needed for one current outcome. The limit makes progress visible and prevents unrelated supplies from becoming permanent passengers.
Photograph the stopping point
Take a quick photo before moving anything. Capture arrangement, thread path, paint mix or hardware order. The image replaces fragile memory and lets the physical workspace reset safely.
If this is a recurring friction point, compare adjustable craft organizer box by dimensions, materials and cleaning requirements rather than rating alone.
Separate tiny parts by stage
Use divided containers for unused, prepared and completed pieces. Label compartments with removable tape. Avoid mixing look-alike hardware, and never rely on color alone when sizes differ by only a few millimeters.
Protect sharp and messy tools
Cap blades, close scissors and store needles in a rigid holder. Wet brushes and adhesive-covered tools need cleaning before the box closes. Solvents, hot tools and strong chemicals require their own manufacturer-approved storage and ventilation.
Add a written next action
End each session with one sentence: cut two panels, sand the edge or attach clasp B. A concrete instruction reduces the emotional friction of restarting and prevents you from re-planning the whole project.
A well-chosen small parts storage case clear can make the routine easier, but only after you know the exact problem it needs to solve.
Use a removable work tray
A shallow tray can lift the current assembly out of the box without disturbing its layout. Choose a light neutral surface that makes small pieces easy to see. A lip keeps round parts from escaping.
Keep the inventory honest
When a material runs low, add it to a note immediately. Do not overfill the box with backup stock; keep reserves in the main supply area. The project box should be portable with one hand.
Reset after completion
Photograph the finished work, return tools, recycle useful scraps and clear all labels. A clean empty box creates a satisfying finish line and is ready for the next project rather than becoming an archive.
A practical buying checklist
- Measure the space or task before ordering.
- Choose materials that tolerate the expected moisture, heat or wear.
- Prefer replaceable parts and clear care instructions.
- Check return terms and compatibility with tools you already own.
- Buy one solution, test it, then expand only if it works.
For the finishing pieces, browse portable craft project bag and compare the useful details that affect daily use. You can also explore related products in Storage and Organization.
Common mistakes to avoid
Do not solve an observation problem with more storage, more product or more power. Start with the smallest reversible change, test it under normal conditions and keep safety instructions visible. Avoid buying a complete system before dimensions and habits are understood. The most profitable purchase is often the one that prevents waste, protects existing equipment or saves repeated setup time.
The seven-day test
Use the new setup for one ordinary week. Note where the routine still slows down, what never gets used and what is difficult to clean or return. Move one item at a time, then photograph the final arrangement. A system that survives a busy day is more valuable than one that looks perfect immediately after organizing.
Final takeaway
Stop Losing Tiny Parts: Build a Project Box You Can Pause Without Regret becomes easier when the environment supports the sequence of work. Observe first, make one focused change and let real use guide the next decision. Thoughtful products can remove friction, but the routine—not the shopping list—is what creates lasting results.